
- Abbreviations
- ch = chain
- sl st= slip stitch
- st = stitch
- sc = single crochet
- Sk = skip stitch
- inc = single crochet increase
- Fo = fasten off
- dec = sc decrease / sc2tog / 2 sc together
- hdc = half double crochet
- dc = Double Crochet
- dc-inc = double crochet increase
- Tc = triple crochet
- Most projects require
- Stitch markers
- Yarn needle
- Fiberfill Stuffing
- Stuffing tool (chopstick or pencil)
- Glue gun (optional)
- Pins
- Safety eyes/Brads
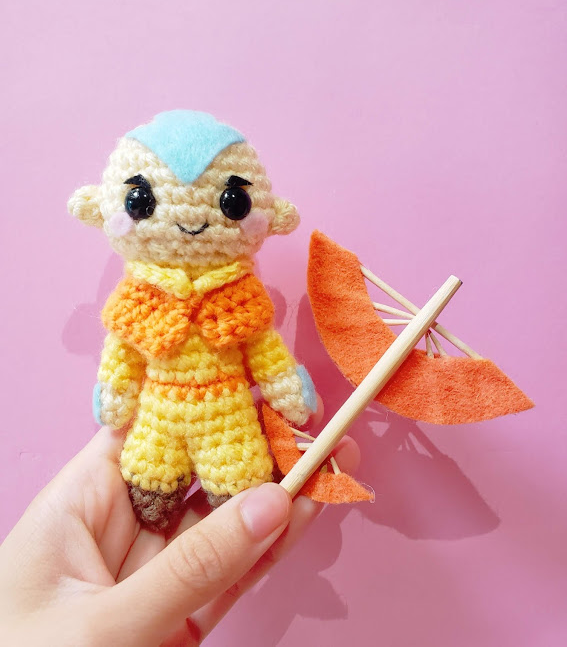
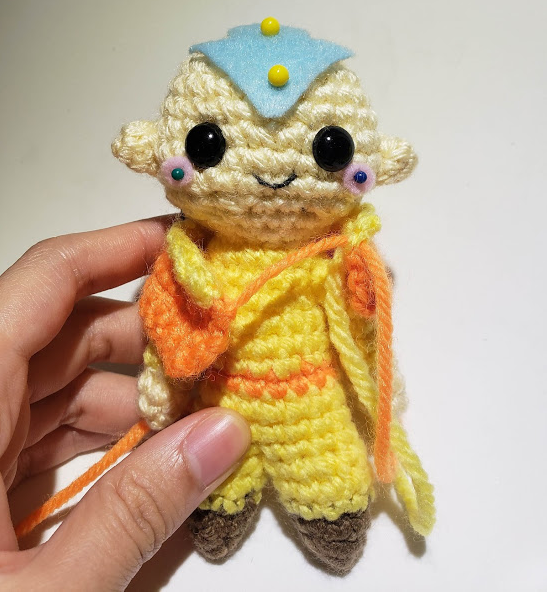
Avatar the Last Airbender Aang Crochet Pattern
Materials
- Size 4 Worsted Weight Yarn in
- Yellow
- Orange
- Tan/Skin color
- Brown
- 9 mm black safety eyes)
- F hook (3.75 mm), D hook (3.25 mm) C hook (2.75 mm)
- Wooden toothpicks, wooden chopstick
- Black embroidery thread
- Felt in Orange, Blue, Pink
- Stiffened felt in black
- Glue gun
- Fiberfill stuffing
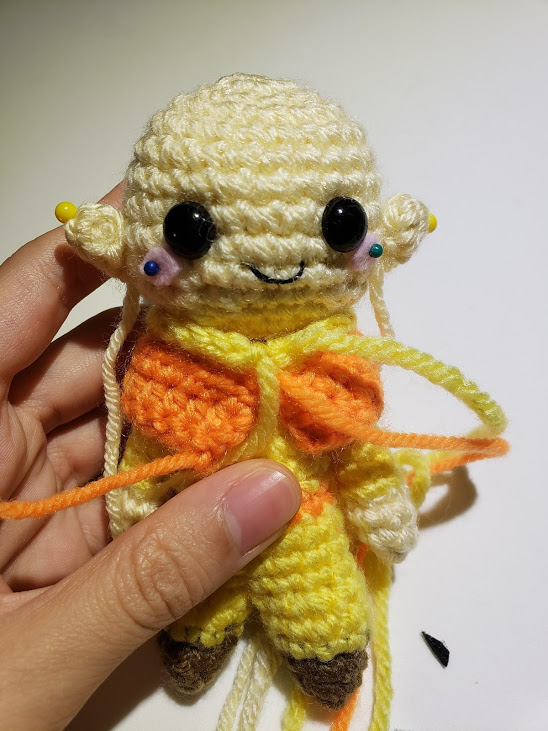
Head:
- R1: 6 sc in a magic ring
- R2: (inc) around]
- R3: (sc) around [12]
- R4: (inc) around [24]
- R5-7: (sc) around
- R8: (sc 5, inc) around [28]
- R9: (sc) around
- R10: (sc 5, dec) around [24]
- R11: (sc 2, dec) around [18]
- R12: (sc 4, dec) around [15]
- R13: Dec, sc 13 [14]
- Insert black safety eyes bt R8 and 9
Ears: D Hook
- R1: sc 4 in a magic ring
- R2: sc, hdc, sc, sl st, fo
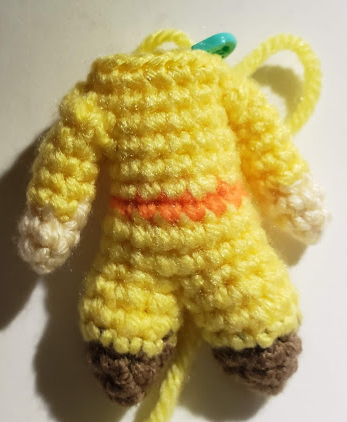
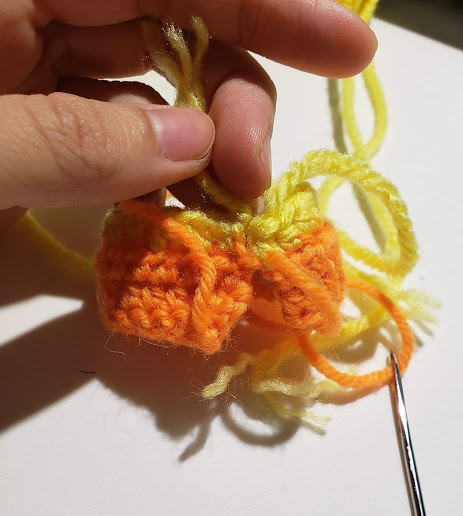
Legs+Body:
- 5 sc in a magic ring in brown
- R2: (sc, inc) x2, sc [7]
- R3: (sc 2, inc) x2, sc [9]
- R4: in yellow: (sc 2, inc) around in FLO [12]
- R5: sc around [12]
- R6: (sc, dec) around, fo [8]
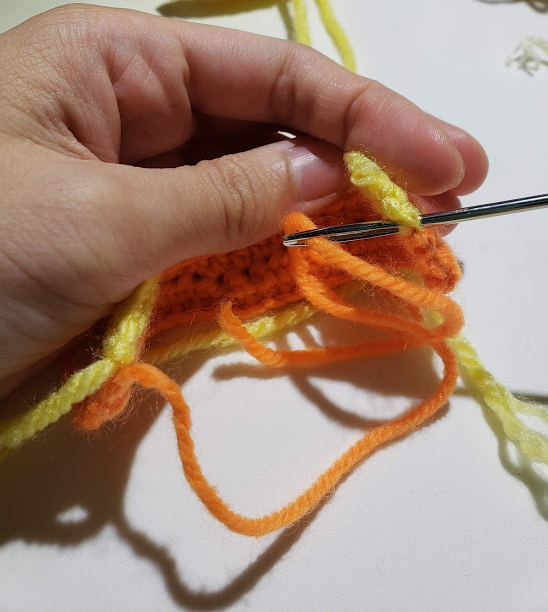
- Make another piece of R1-R6 but DO NOT FO
- R7: insert crochet hook into st of first piece to connect the pieces together: sc around [16]
- R8-9: sc around
- R10: sc around in orange
- R11: (sc 6, dec) around [14] in yellow
- R12-15: (sc around)
- (stuff along the way)
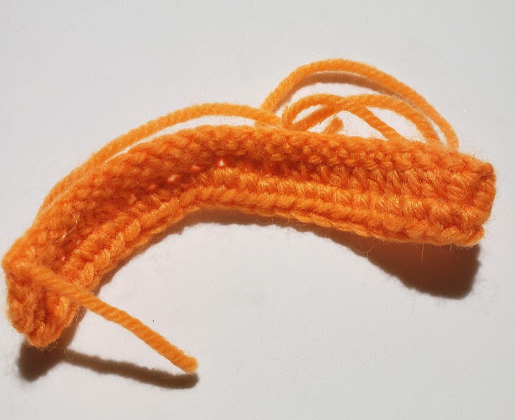
Collar/cape: C hook
- (I used thinner unlabeled yarn - adjust your rows based on your yarn size)
- R1: ch 26, sc 25 in orange
- R2: hdc 10, dec 2, hdc 12
- R3: hdc around, fo. [23]
- R4: start new ch with yellow yarn: sc, hdc 2, dc, sc 15, dc, hdc 2, sc [23]
Arms:
- R1: mr 5 in tan/skin color
- R2: sc 2, inc, sc 2 [4]
- R3: sc around [4]
- R4: sc in yellow in FLO
- R5-7: sc around
- R8: ch, hdc 2, sc 2, sl st.
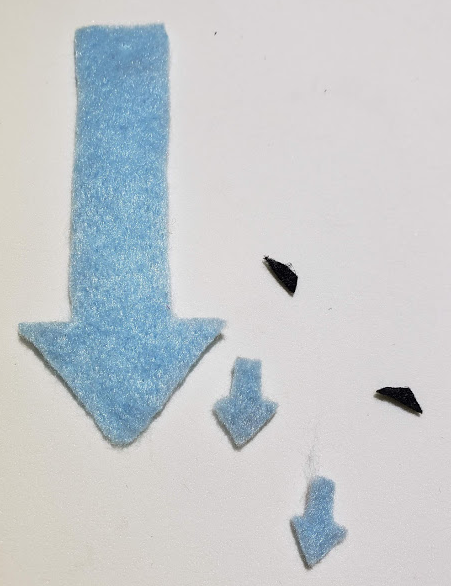
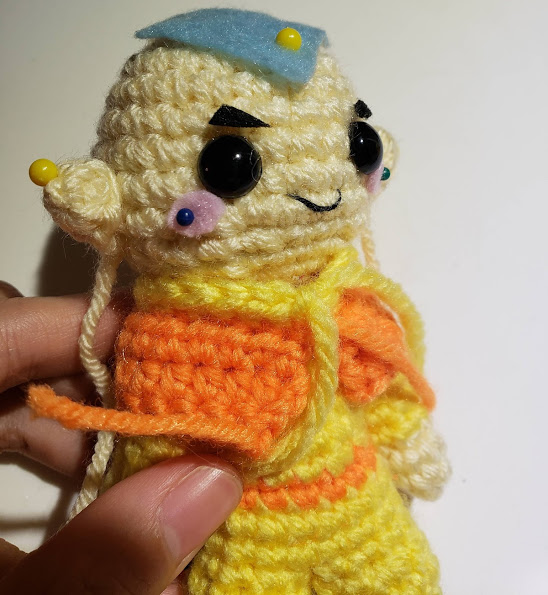
Tattoos and Eyebrows:
- cut the arrows and eyebrows using light blue felt and black stiffened felt
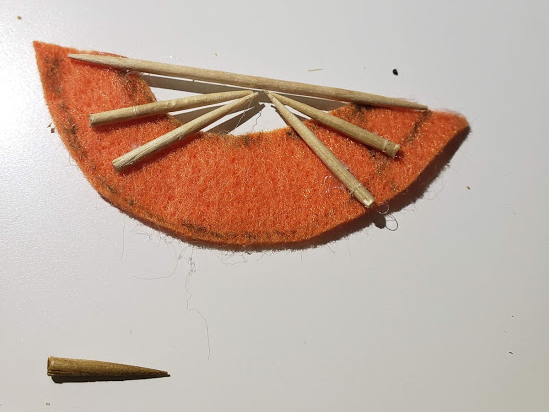
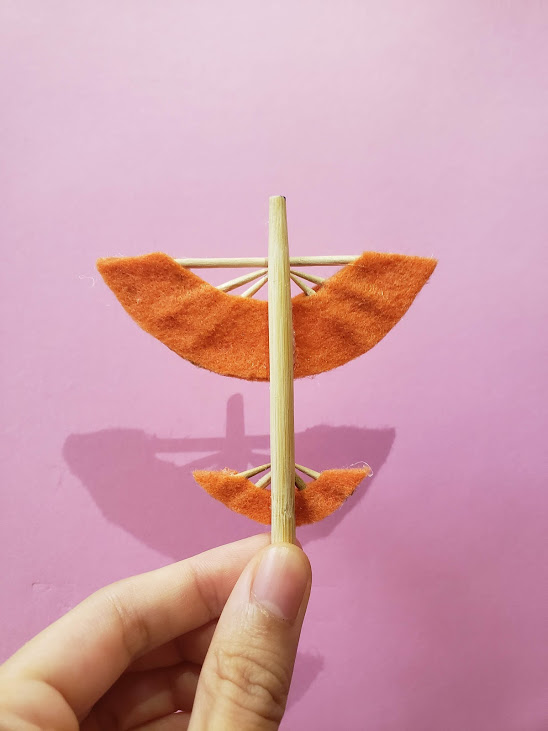
Glider:
(needs 4 wooden toothpicks and 1 wooden chopstick)
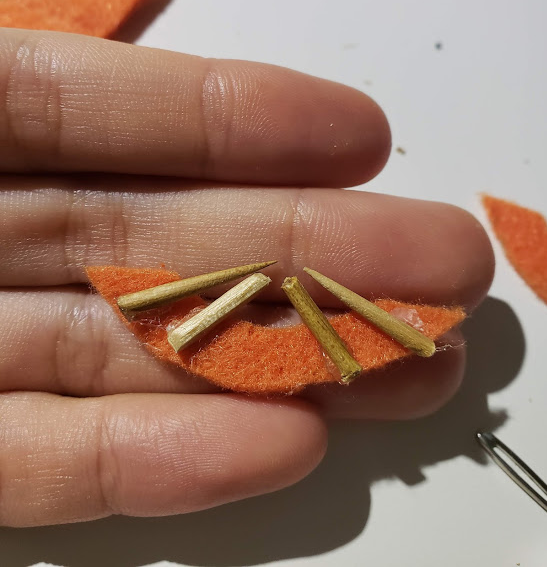
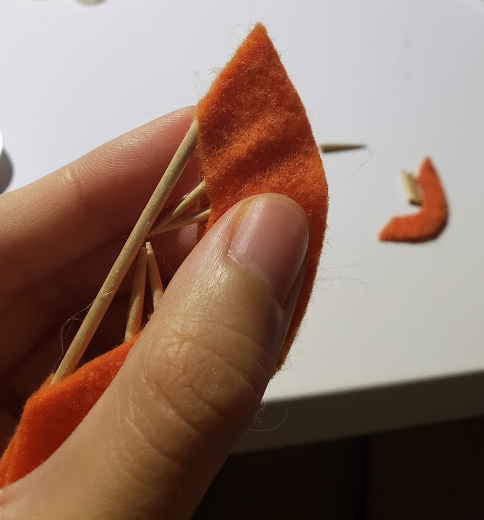
- Top portion: split 2 wooden toothpicks, and position as pictured. 1 whole toothpick at top. You will use this top toothpick as the starting point of the flag portion.
- With orange felt: cut 2 big half crescent shapes as shown. Cut 2 smaller half crescent shapes
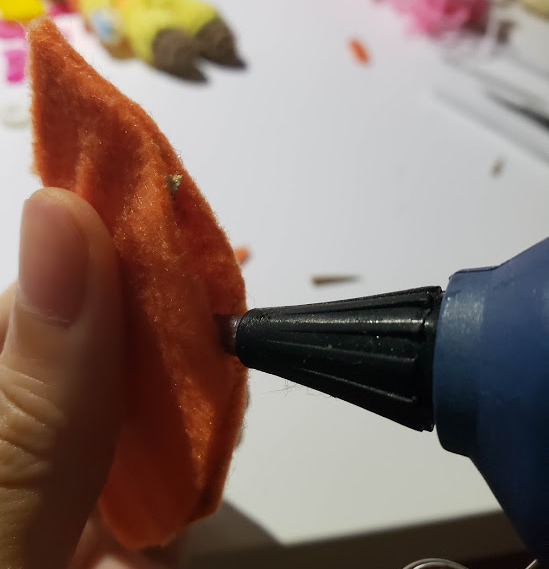
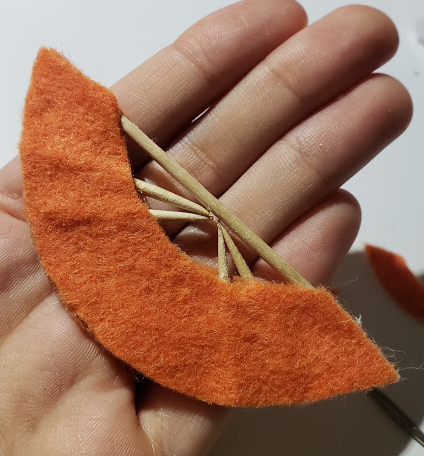
- Glue gun the toothpicks to the crescent moons as shown
- repeat with the smaller crescent moons (bottom of glider)
- Split a wooden chopstick in half and use that half as the base of the glider. Trim the rough edges with a sharp scissor
- Glue gun the wooden chopstick to as pictured
Assembly:
- Sew ears to head. Head to body. Arms to body. Cape to body. Glue gun tattoo arrows, eyebrows and optional cheeks.
- Embroider smile with black embroidery thread (I used 3 ply)
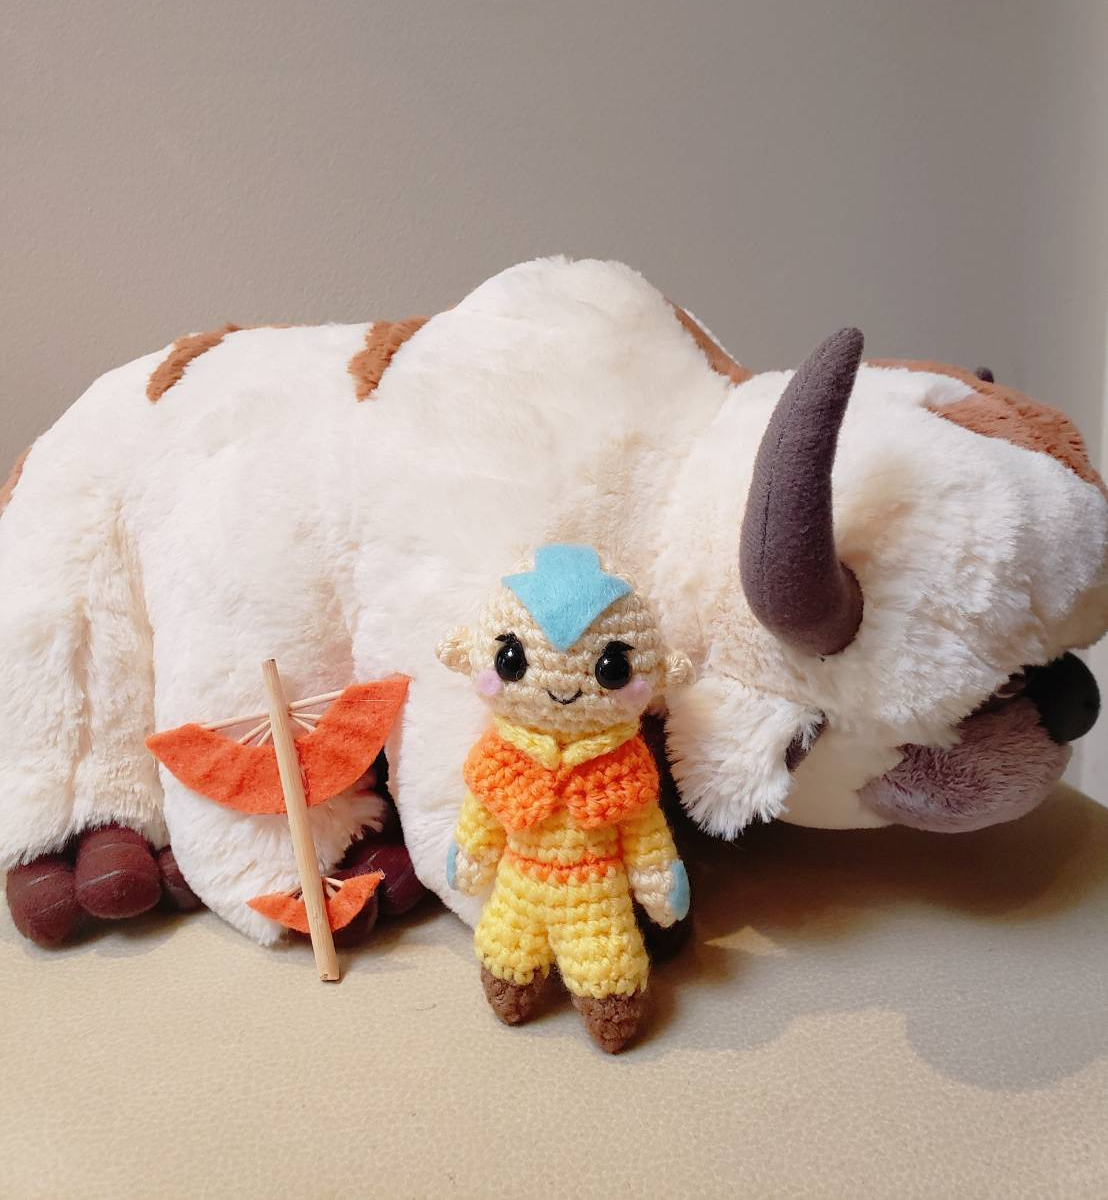
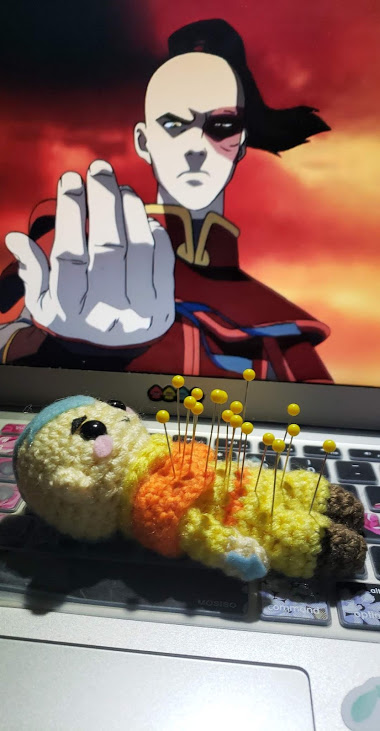
Enjoy saving the world with your new handmade airbender (or to use as your own pin cushion like early Zuko would! XD) Don't hesitate to send me a message through instagram or my website for any questions~